- Insertion
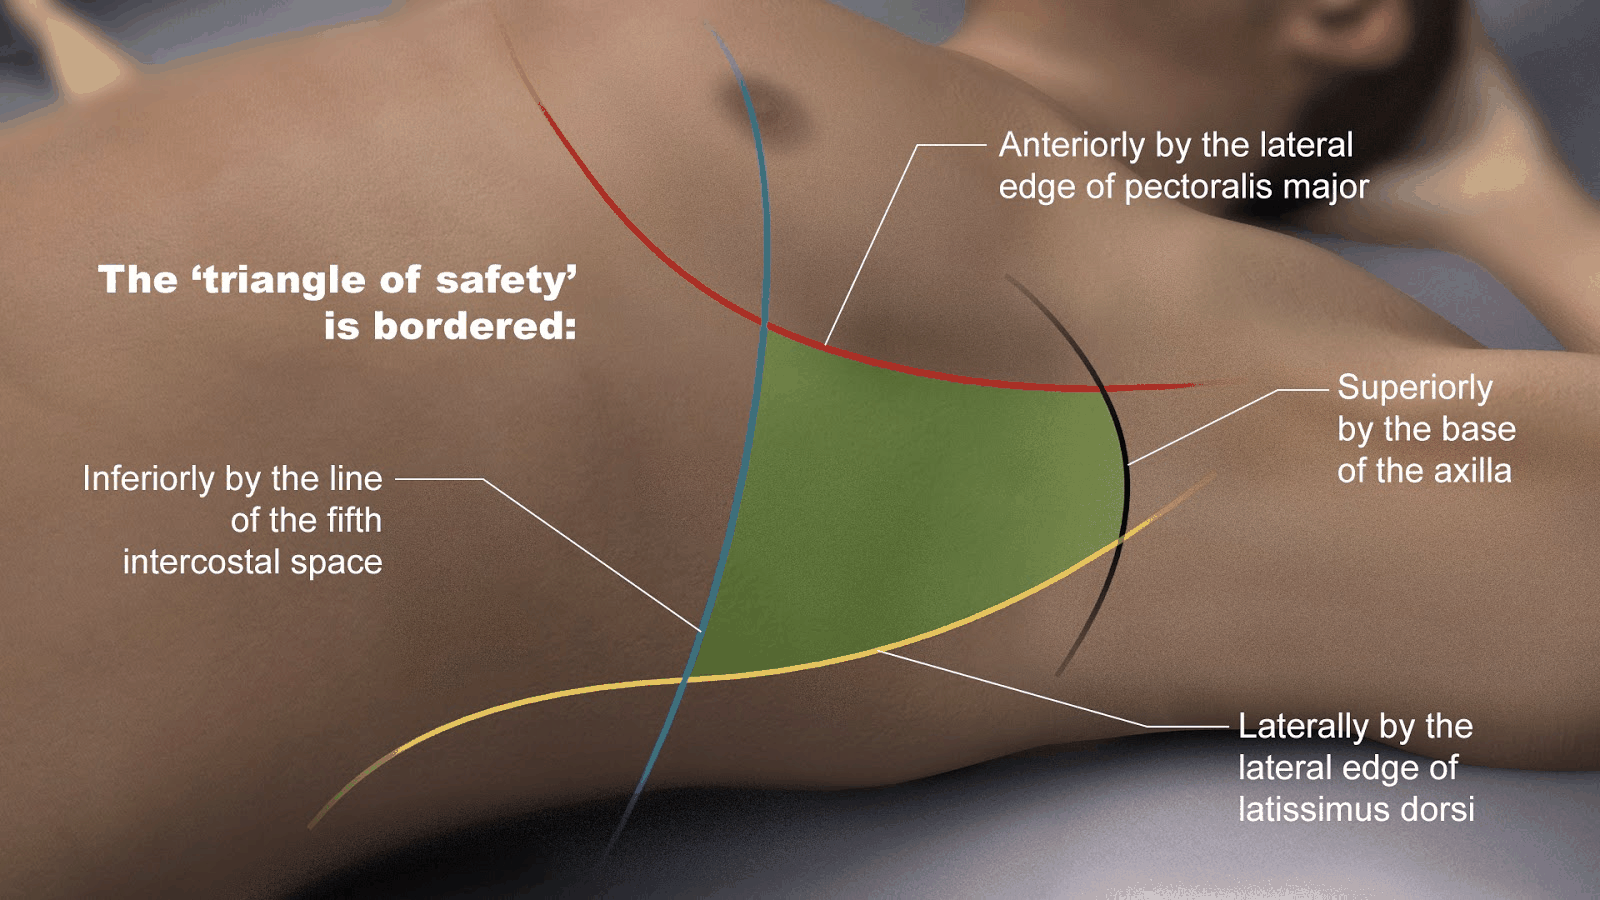
- Via triangle of safety - pec major | lat dorsi | 5th ICS (above)
- Indications
- Haemothorax
- Pneumothorax
- Tension, > 3cm, Any resp distress
- Any size undergoing transfer, GA or positive pressure ventilation (say this for the exam but in reality not all patient receving PPV need a chest drain but instead close monitoring)
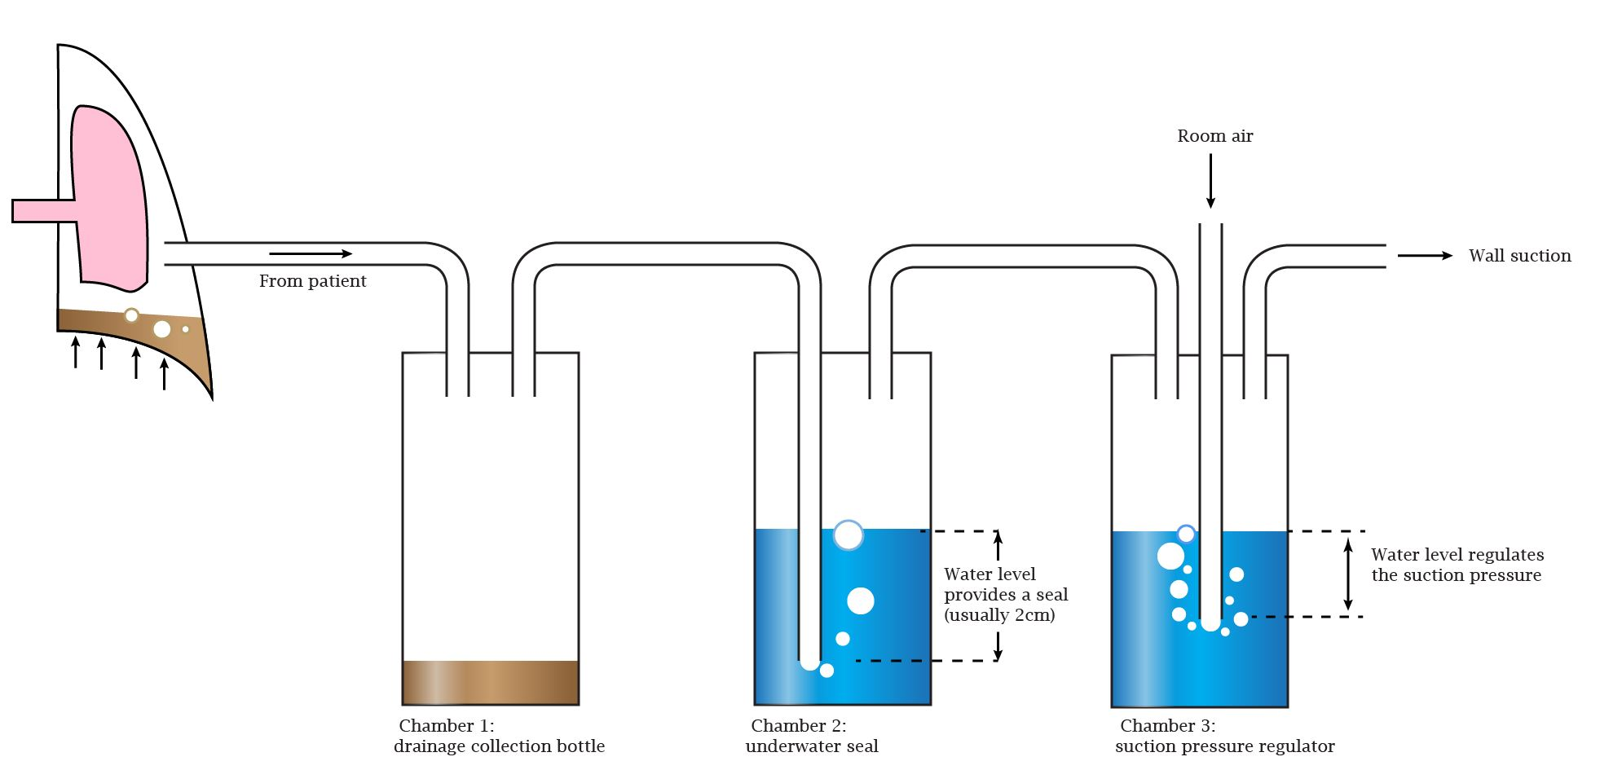
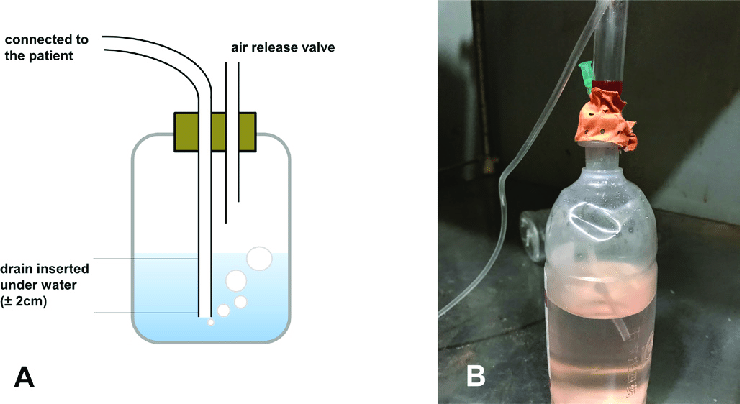
- Mechanism of effect of an Under Water Seal Chest Drain
- A system that allows drainage of the pleural space using an airtight system to maintain subatmospheric intrapleural pressure; the underwater seal acts a one-way valve
- Expiration and coughing pushes air out via drain and causes bubbling
- Chest drain creates a siphon effect for fluid and air
- Fluid drained via gravity (keep canister below level of insertion)
- Air drained through water seal valve reservoir which prevents back flow into the pleural space
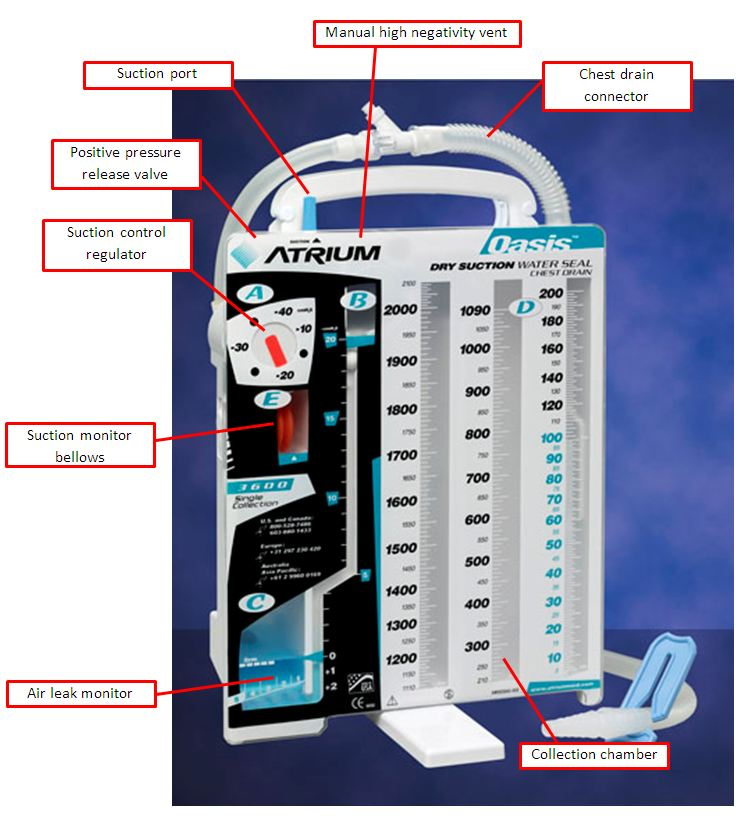
- Equipment
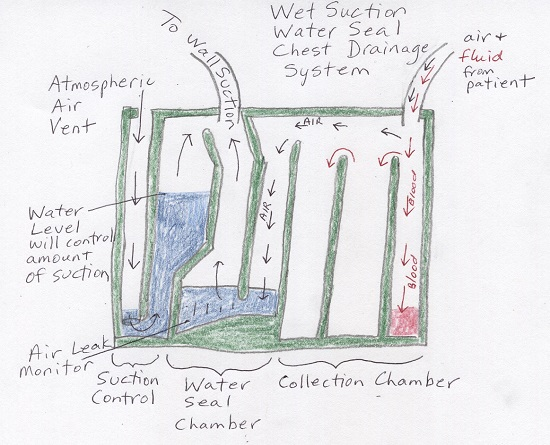
- 3 chambers - fluid, air and suction
- 1 - fluid trap or collection bottle, can be independently emptied and allows accurate record of drainage amount
- 2 - underwater seal drain, maintained at a predetermined level whilst still allowing for drainage of pleural fluid (if bubbling continuously → bronchopleural fistula)
- 3 - manometer or pressure-regulating bottle allows suction to be attached and should bubble continuously
- 3 chambers - fluid, air and suction
- Complications
- Bleeding - Intercostal vessels → HTX
- Pain - Intercostal nerve
- Traumatic organ injury - lung, great vessels, oesophagus, colon, spleen, liver
- Infection
- Malposition/kinking/blocking
- Recurrence or tension
- Pathophysiology
- HTX and fluid drained by gravity dependence - chest drain below patient
- PTX drained via UWSD
- Normally intrapleural pressure is negative
- Chest injury causes loss of negative intrapleural pressure - lung collapse
- Chest drain drains air as intrapleural pressure is higher
- Air bubbles and can’t return due to UWSD
- Vented out as well to maintain pressure gradient
Procedure
- Positioning and site selection
- Position patient sitting upright or semi-recumbent at 45°, with arm on affected side raised behind the head
- Identify the “safe triangle”:
- Anterior border of latissimus dorsi
- Lateral border of pectoralis major
- Line superior to the nipple (5th intercostal space)
- Mark the insertion point just anterior to the mid-axillary line, 4th or 5th intercostal space
- Asepsis and anaesthesia
- Clean skin widely and drape
- Infiltrate local anaesthetic into skin, subcutaneous tissue, intercostal muscles, and pleura
- Aspirate to confirm entry into pleural space (air or fluid return)
- Incision and blunt dissection
- Make a 2–3 cm horizontal incision
- Use curved haemostat or artery forceps to bluntly dissect through tissues
- Over the rib below the interspace (to avoid neurovascular bundle)
- Pierce parietal pleura with controlled force—may feel a “give” or air/fluid egress
- Finger sweep
- Insert gloved finger into pleural space to confirm entry and exclude adhesions or organs
- Chest tube insertion
- Direct tube posteriorly and superiorly for air, or posteriorly and inferiorly for fluid
- Advance until last side hole is well inside the pleural space (typically 12–18 cm)
- Connect to underwater seal drainage system
- Secure and dress
- Anchor tube with heavy silk suture (e.g., stay and purse-string technique)
- Apply occlusive sterile dressing
- Post-insertion checks
- Confirm bubbling (for pneumothorax) or fluid drainage
- Check for swinging with respiration
- Obtain a chest X-ray to confirm position and re-expansion of lung
- Postoperative care
- Monitor output volume and quality
- Daily review for air leak, signs of infection, or malfunction
- Clamp trial (if indicated) before removal
- Remove when no air leak and fluid output is minimal